Showing posts with label fruit. Show all posts

Tuesday, July 31, 2012

Ice Cream Sundae Cupcakes

First, please excuse the short post. Life is crazy busy right now but I didn't want you to think I'd forgotten about you!!

These cupcakes were so fun and cute! My brother-in-law's birthday is this week and he loves ice cream cake. Well, this is a cupcake blog and I thought it would be cool to figure out a way to make awesome cupcakes that would make him happy....


These were made with my go-to dark chocolate cupcakes, filled with vanilla icing, and topped with Black Cherry frozen yogurt, Cookies 'n Cream ice cream, and a cherry.Yum!


Happy birthday, Chris! I hope it's the best one yet!!


In other news, I went with Chris and my sister, Candice, for their 4D ultrasound this week. This was, by far, the coolest thing I've ever seen! She is 27 weeks along and the details that we were able to see were just incredible. The next two weeks are gonna be pretty busy for me with all the planning I'm involved in for her baby shower so if I'm MIA - sorry! I will say that, thanks to all of you, I have hit the 200 follower mark between GFC and Bloglovin!! This means that an awesome giveaway will be going on all next week with some awesome prizes from several of my bloggy friends! Also, the week of the 19th will be Baby Shower week with the recipes from most of the food we'll be serving, all leading up to the big party reveal! 

Meanwhile, here's a picture that I just have to share with all of you! Meet....


Until next time, happy reading and more importantly, happy cupcake-ing!


Thursday, July 26, 2012

Mixed Berry Lemonade {Sunflower} Cupcakes


I know - the title makes you wonder - but I’m so excited to tell you about these cupcakes! They turned out so perfectly (if I do say so myself) and were such a hit! I can’t tell you how fulfilling it is to ghave an idea that comes together, start to finish, and makes other people happy!!

 I made these for a dear friend of our family whose birthday we were celebrating. This lady and her husband are such a huge part of our lives and we are so thankful to know them! Linda is an awesome woman and a huge encouragement and blessing in our lives. Her husband Jim is like a second dad to us and a really great friend to my dad! She is currently going through her third, yes THIRD, bought with cancer and her attitude is just amazing! She knows that God is in control and, while she certainly has her moments, she takes everything in stride and faces it head on – with God leading the way!! I know she has to be scared, but her faith is what gets her through. I’m just so humbled by her. So, when Jim said he wanted to do something for her birthday, I was in! And I knew exactly what I wanted to try. Her favorite flowers are Sunflowers so here’s where my mind went…


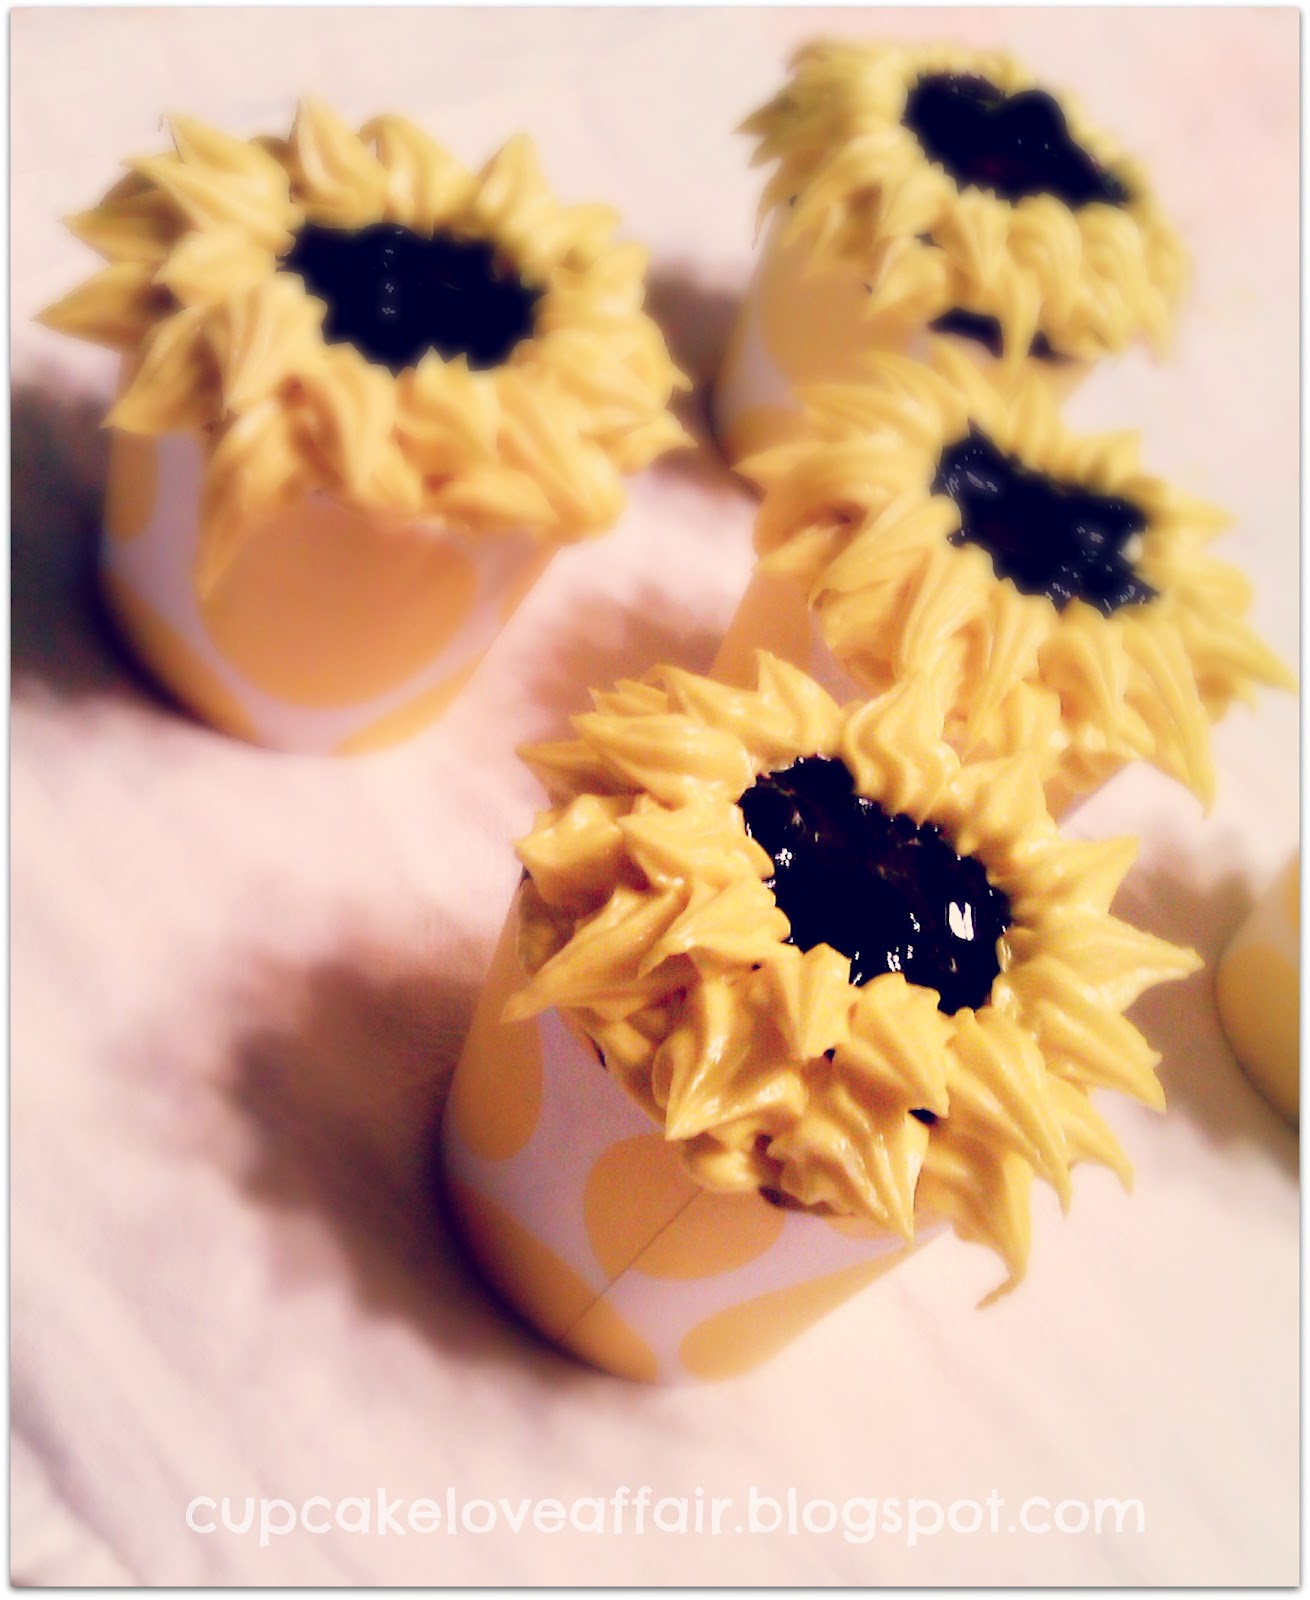
Ah! They're just so pretty...I love them!  

Anybody recognize those liners? I got them from Pick Your Plum and love them!! Check out the link on my side bar under "affiliates" for more of their awesome goodies!

Here's how I made these beauties...

Mixed Berry Lemonade Cake

1 box white cake mix
4 egg whites
1 cup water
1/4 cup vegetable oil
1/4 cup sour cream
1 cup frozen (can use fresh) blueberries
1/2 cup frozen (can use fresh) strawberries
2 tablespoons blackberry jam
Juice and peel of 1 lemon

Preheat oven to 350 degrees and prepare cupcake pans. Mix all ingredients in mixer until just combined. Fill cupcake liners about 2/3 full with batter and bake until springy to touch or tester inserted in middle comes out clean. Let cool.

Lemon Cream Cheese Buttercream

1 stick unsalted butter, softened
1/2 cup shortening
1 (8 oz) package cream cheese, cold
1 teaspoon vanilla
juice and peel of 1/2 lemon (or more depending on desired taste)
yellow gel food coloring
approx. 4 cups confectioner's sugar

Cream butter, shortening, and cream cheese until light and fluffy. Add vanilla, lemon juice and peel and mix until combined. Add sugar, one cup at a time, mixing well after each addition. If you need more than 4 cups for consistency, add extra a little at a time until you get it where you want it. Add enough food coloring to reach desired color and keep icing cool until ready to use.

You'll be happy to know that I actually took pictures of the flower making process! Now you can see what I'm talking about as I explain the procedure....yay me! 

Step 1


Lightly frost cupcake with a small amount of icing and drop about a teaspoonful of blackberry jam in the center. It's ok if the jam runs because you're going to cover this up with the petals. 

Step 2


Around the outside edge of the cupcake, use a star tip to pipe a row of petals all the way around. To make each petal, press on your piping bag so that the icing starts to come out of the tip, stop pressing, and pull away from cupcake. If you're not comfortable with piping, you may want to practice a few times on parchment or wax paper. Once you get it down and feel comfortable, you can scrape the icing up and mix it back into the bowl to use on the cupcakes (waste not, want not). ;)

Step 3


Last, but certainly not least, move in on the cupcake and pipe a second row of petals, making sure to completely cover the edge of the jam so that you have a round center. Try to place this second row in between the petals of the first row. Voila! A beautiful sunflower cupcake!!


Even if you don't make the sunflowers (although I don't know why you wouldn't...they're so perfect for summer) please try this recipe! It's so delicious and refreshing this time of year. My dad said that these are his favorite so far and, even though I started with a box mix, I still feel accomplished because I doctored it up so much. 

Also, two things you may have noticed. First, A Cupcake Love Affair is now accepting sponsorships through Passionfruit Ads. If you're looking for a place to advertise your blog or shop, stop by my Sponsor page and check out all the options! Second, you may have noticed that my followers count is steadily heading toward the big 200 (well, for me, that's big)! Between GFC and Bloglovin', almost 200 readers are following along with us and I have to tell you that that's really exciting for me! I never thought that many people would be interested and, yet, you all just keep on showing up and coming back for more. Thank you! I've decided to do another giveaway when I reach 200 so spread the word. What will I be giving away? Let me just say this...I won't be the only one giving something away and the number of "bloggy" friends who have volunteered to participate...well, you don't want to miss this!! If you're a fellow blogger and would like to participate in the giveaway, shoot me an email on my contact page.

I hope you're all having a fantastic summer! Until next time, happy reading and more importantly, happy cupcake-ing!


Friday, July 20, 2012

Fresh & Fruity Jello Cake


Hey friends! I'm really excited to tell you all about this cake! It's been a favorite of my family's since I was a little girl and we eat it quite often in the summertime. It's so light and refreshing and just the perfect ending to a warm evening with friends and family!


Fresh, Fruity Jello Cake

Now, growing up, my mom would make this with a boxed white cake mix and Cool Whip. However, since I am now a pastry chef and you are here for a dessert that's a little more impressive, we'll start with a light, airy sponge cake as the base.

Vanilla Sponge Cake (adapted from here)

1 cup all purpose flour
11/2 t baking powder
1/4 t salt
5 whole eggs
1 cup sugar
1 t vanilla
1/3 cup milk

Preheat oven to 350 degrees. Fill muffin pan with liners. Combine flour, baking powder, and salt in a large bowl. Separate eggs. Beat egg yolks with 3/4 cup sugar on high speed until yolks are pale yellow. Stir in milk and vanilla. Pour egg yolk mixture over the flour mixture and stir very gently until combined. Beat egg whites on high speed until soft peaks form. With the mixer on, pour in remaining 1/4 cup sugar and beat until egg whites are stiff but not dry. Fold egg white mixture into the batter very gently until just combined. Pour into prepared pan and bake until lightly golden brown and tester inserted into middle comes out clean.

While the cake is cooling, make your favorite flavor of jello, leaving out the cold water. In other words, only use the boiled water it calls for and don't add the cold once it's done cooking. Next, prepare your cake for the jello. For this presentation, I cut the cake into two layers and poured jello over both.


For the whipped cream I don't really follow an exact recipe. The ingredients I use are heavy whipping cream, confectioner's sugar, and vanilla. The amount of sugar is dependent upon the type of dessert I am making (more for a less sweet cake or pie, and less for a sweeter one). The finishing, and most important, touch is the fresh fruit. You can use whatever you want for this cake. I chose raspberries and blueberries. Traditionally, my mom uses just strawberries. You're probably already thinking this, with the time of year that it is, but this dessert is a great choice for the Fourth of July. In fact, I usually make it every year, forming the American flag on top with strawberries and blueberries. This time I chose to fill the cake with the whipped cream and fruit and then topped it with the same for a more rustic, homemade look. I love how creative you can be with this cake!


Just have fun with the flavors, start your own family tradition, and most importantly....


....enjoy!

Have a wonderful, safe summer and take time to make lots of memories! Time spent with loved ones is more important than any thing you can own and even more than any cake you will eat (it's close...but, yes, even more than cake!) :) Until next time, happy reading and more importantly, happy cupcake-ing!

Friday, July 13, 2012

Whole Wheat Banana Bread

I have a confession to make. I hoard brown bananas. Yep, that's right. Out of every 10 bunches of bananas my family buys, I usually put 10 bananas in the freezer for baking. No joke. I wish I had taken a picture of the bowl of rotten bananas that I pulled out of my freezer before baking this bread! Hindsight and all that. Just trust me on this...I pulled at least 20 nasty looking bananas out of my freezer and did a little happy dance the other night. It's ok. I'm weird and I know it. But really, nothing makes me happier some days than one of those guys. The browner and squishier (is that even a word?) the better!

When they start to look like this...

Source

...I put them in the freezer, they turn to this...

Source

...and I turn them into this...

Whole Wheat Loaf ready to be shipped to a friend!

Slices of the loaf that my family got to eat! :)
I love banana bread! It's one of my favorite comfort foods and one of my favorite ways to enjoy it is with some peanut butter spread on a warm slice. Yum! I have tried several different recipes and, while I've found several that I like, this one is my favorite because, one,  it's moist and, two, the ingredients are a little healthier than other versions so I don't feel quite as bad if I eat half a loaf. Not that I would, of course! :)

Whole Wheat Banana Bread (adapted from here)

  • 1/2 cup unsalted butter, softened
  • 2/3 cup dark brown sugar, packed
  • 1 teaspoon vanilla extract
  • 1 teaspoon ground cinnamon
  • 1/4 teaspoon ground nutmeg
  • 3/4 teaspoon baking soda
  • 1/2 teaspoon salt
  • 1 1/2 cups mashed ripe bananas (about 3-4 medium bananas)
  • 1/4 cup honey
  • 2 large eggs
  • 2 cups whole wheat flour (can subsitute AP or use half and half)
  • 1/2 cup chopped walnuts, optional
  • 1 cup chocolate chips, optional
Preheat oven to 350 degrees and lightly grease loaf pan(s).

Beat together butter, sugar, vanilla, cinnamon, nutmeg, baking soda, and salt until smooth. Add in bananas, honey, and eggs and beat until smooth again. Mix in flour, one cup at a time, until smooth and add in optional ingredients. 

Bake at 350 degrees for about 45 minutes to one hour (depending on oven), watching top for signs of burning. If you see that your top is getting done too fast, place a piece of aluminum foil on top of bread to slow it down. Once a tester inserted into center of loaf comes out clean, remove bread from oven and cool about 15 minutes before removing from pan.

Baker's tip:

Have you ever noticed that things taste different depending on temperature? The best time to taste test your baked goods is once they reach room temp. Now, I'm not saying that this is how I enjoy eating all baked goods! I definitely prefer my cookies a little warm. However, if you're wanting to know what your finished product actually tastes like (i.e. how well all the ingredients came together, do I need to add more banana to my recipe?, etc...), let it cool to room temp and taste it then. If you have perfected your recipes and know, for sure, that it's exactly the way you want it, then by all means, eat that cookie while it's still warm and gooey! The messier the better! 

However you like to enjoy your banana bread, give this recipe a try. It's a little nicer to the hips and, really, very tasty! Until next time, happy reading and more importantly, happy taste-testing cupcake-ing!

Monday, July 9, 2012

Fresh Fruit Tart for Summer

Hey friends! I was a guest over at Shaken Together two weeks ago and today I'm sharing the dessert I made with you! Now, I know this is another patriotic post, however, this dessert can be made for any occasion. All you have to do is arrange the fruit any way you want! You can also use more than just blueberries and straeberries. Bananas, kiwi, raspberries...the possibilities are endless!

So, without further ado...

Red, White, & Blueberry Fruit Tart

To start, use a good quality tart pan (if you don't have one, you could easily use a pie plate or even, in a pinch, a cake plate). Spray the pan with cooking spray and line with your pie dough. I have a confession. I buy mine. I know...I know. I'm a pastry chef who doesn't make her own pie dough. However, I just don't think the small difference in taste or pride or whatever it is that drives people to do it is worth the time and effort. I've found that Publix, Pillsbury, and even the brand at Sweetbay are just as tasty and oh so easier to deal with. You'll find what I'm talking about in the refrigerated dough section of the grocery store and they usually come in a package of two. They're rolled up so all you have to do is remove the dough from the box and plastic sleeve, roll it out, shape it however you want, and voila! Done is done. If you have to make it from scratch, by all means, do so. In fact, you can come over to my house and make it for me from now on! ;)

Anyway, whatever dough you use, press it into your pan, poking holes in it with a fork, place a layer of either aluminum foil or wax paper on it, fill it with dry beans or rice, and bake until golden brown. 

Once the crust is baked, set aside and let it cool.

Now, on to the pudding (or creme patisserie, aka pastry cream, if you wanna be fancy). This stuff is amazing and totally worth the effort and time to make it! This is what pudding should taste like!

Pastry Cream

2 cups whole milk (don't skimp on the fat, use whole, you'll thank me later)
1/4 cup granulated sugar
2 egg yolks
1 egg
1/4 cup cornstarch
1/3 cup granulated sugar
1 teaspoon vanilla extract
2 Tablespoon unsalted butter

Warm milk & 1/4 cup sugar over medium heat just until it starts to steam and you see little bubbles forming on top. Meanwhile, whisk yolks, whole egg, sugar, and cornstarch until smooth and pale yellow in color. Next, pour half of milk into egg mixture while whisking to temper eggs. Pour egg mixture into pan with the rest of the milk and heat, whisking constantly, until bubbling and thick, pudding-like in texture. Remove from heat and add vanilla and butter; mix until butter is melted. Pour into pie crust, cover with plastic wrap making sure plastic touches top of pudding to prevent a film from forming, and refrigerate for at least one hour or overnight. 

The day that you are serving, place your fruit in whatever design you want and you're ready to enjoy!

For the star design, here's what I did:

I cut out a parchment round the size of my pan. Then, I drew a star on the parchment and cut it out. I used this template for placing my fruit on the tart, starting with the blueberries, then moving on to the strawberries. I kept filling in fruit until I reached the look I wanted. You could also make an American flag. When I'm making this dessert for something other than a patriotic holiday, I usually add kiwi, raspberries, and bananas and alternate the pattern for a beautiful presentation. The possibilities are endless!


Well, I hope you enjoyed reading about this dessert but, more importantly, that you try it for yourself. It really is delicious and perfect for summer!!


Friday, May 11, 2012

Fruit {Cake} for a Summer Birthday

Ever wondered what to make for someone on a diet for their birthday? Well, wonder no more; I have the answer for you here. One of the sweet ladies in my office (I call her Granny) is on the South Beach Diet and asked me to please not make a cake or cupcakes for her birthday. I'm sorry, what?? But, I'm a pastry chef. It's kinda what I do!

How gorgeous is that??


So, of course, I hit up Pinterest for ideas. Oh man. I was not let down. This idea is so great that I would make it for a summer barbecue, a brunch, or, well, to be an honest, an afternoon snack. If you know a fruit lover you have to make this. I mean it. If you don't, you're just plain mean. It's so easy. At first, I thought, "I don't carve fruit. How do I tackle this watermelon?" Don't even worry. Beginners, don't think it's not for you. If I can do this, you can too.

So sad I missed this white spot! 


You start with a large watermelon, as smooth as you can find, with minimal lumps and bumps. I literally moved every single watermelon that Walmart had in the bin to find the best one from the bunch. Sorry I don't have a step-by-step picture tutorial. I never think about that until after the fact so I'll do my best to explain in words.


First, I cut off each end of the watermelon. Then I turned it to stand up on one end and started carving down each side with a large, sharp knife, turning as I cut, making sure to get as much rind and white off as I could. Then I went back around, carving until I was satisfied with the "cake" shape. Next, I peeled and sliced kiwi and used it for the bottom border. I washed and dried the strawberries, cut them in half, then used them to decorate the top border, securing each one with a toothpick. I used one large, beautiful strawberry for the center of the top of the cake. Granny LOVES butterflies so, with the help of my sweet mama, I hand cut butterfly shapes out of cantaloupe and used a sliver of strawberry for the body, also using a toothpick to secure them to the sides of the cake. I hope that makes sense. I read it out loud to one of my sisters and another sister's boyfriend. :) If you have any questions or need clarification, please feel free to ask!


There you have it, folks. A delicious, nutritious treat for a special (or just because) occasion. Hope all you mothers out there have a wonderful Mother's Day! My family and I are currently at the beach and loving life.  Family fun, relaxing at a vacation home on the water....oh yeah! Until next time, happy reading and, more importantly, happy cupcake-ing!


Related Posts Plugin for WordPress, Blogger...